
You’ve got a Chromebook open, a Zoom invite in your inbox, and about ten minutes before someone important asks why your camera isn’t on. That’s a common support ticket.
Zoom on Chromebook does work. But it works best when you stop treating ChromeOS like Windows or macOS. The confusion usually starts with the options. You’ll see old app references, browser prompts, Play Store listings, and meeting links that all seem to point in different directions. That’s where time is often lost.
The practical answer is simple. On a Chromebook, you should treat Zoom as a browser-first service and use the path that gives you the least friction. That means understanding which version to use, how to configure permissions correctly, and where Chromebook hardware starts to show limits. If you skip those basics, you end up troubleshooting in front of your team.
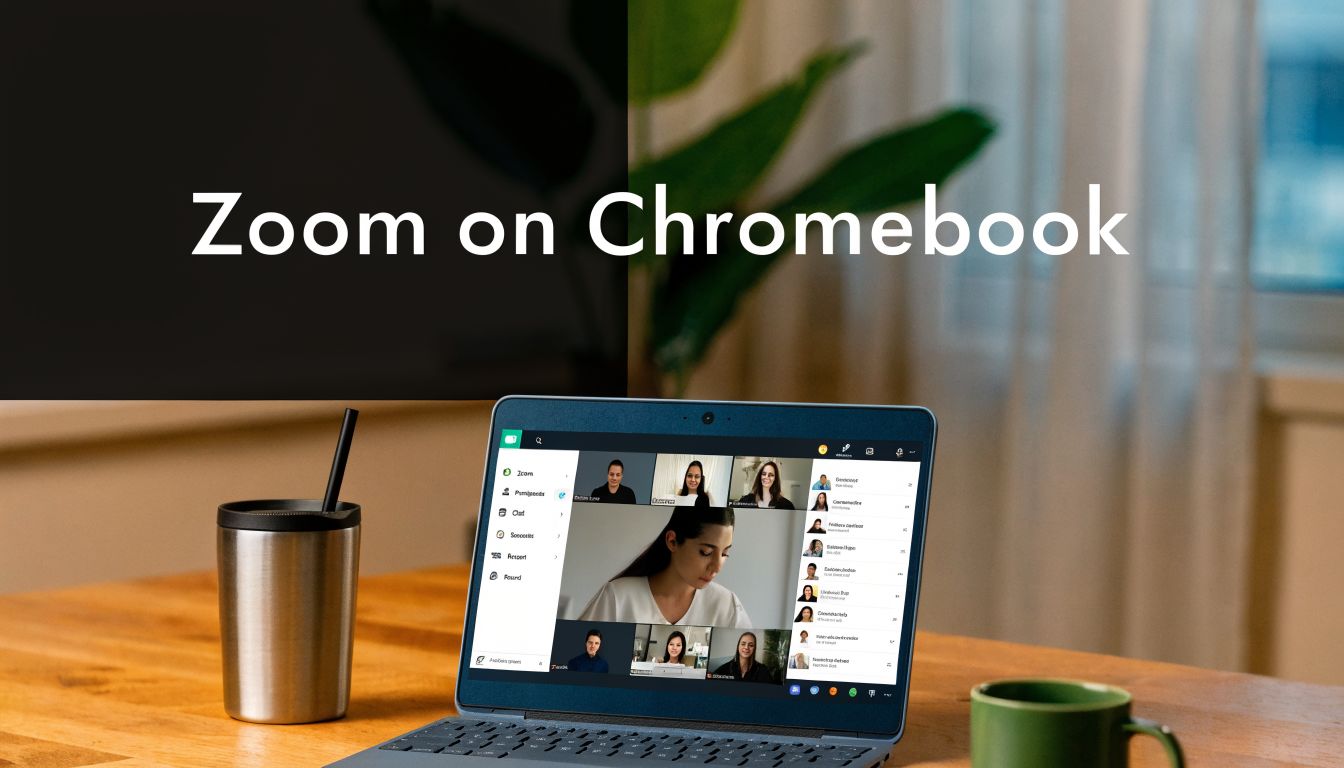
Your Essential Guide to Using Zoom on a Chromebook
A new Chromebook feels straightforward until the first live meeting. The device boots fast, signs into Google quickly, and handles web apps well. Then Zoom enters the picture and suddenly there are questions about whether you need an app, whether the browser alone is enough, and why some features don’t look the same as they do on a coworker’s laptop.
That confusion is normal. ChromeOS has pushed video conferencing toward lighter, browser-oriented tools, and Zoom has adapted with a Progressive Web App, or PWA, instead of the traditional desktop software model. For most users, that’s the right direction. It removes a lot of install friction and fits the Chromebook model better than trying to force a desktop-style experience onto low-power hardware.
The catch is that “works” and “works well” aren’t the same thing. On a Chromebook, small setup mistakes matter more. A stale Zoom extension, bad permission prompt, overloaded browser session, or weak Wi-Fi signal can turn a routine meeting into a scramble.
Here’s the way I’d approach zoom on chromebook in any business or school rollout:
- Pick one Zoom path: Don’t keep old Zoom apps, extensions, and browser shortcuts competing with each other.
- Set permissions before the meeting: Camera and microphone failures almost always show up at the worst moment.
- Respect Chromebook limits: Lightweight devices are fine for basic calls, but heavy multitasking changes the experience fast.
- Know when the platform is the problem: If your team is also implementing enterprise telephony, browser behavior, device management, and user consistency start to matter more than they do for casual one-off calls.
The best Chromebook Zoom setup is the one with the fewest moving parts. Every extra app, tab, extension, and background process increases your chances of failure.
If you need Zoom on a Chromebook today, there’s a reliable way to get there. But it helps to go in with realistic expectations. You can make it dependable, professional, and usable. You just can’t pretend ChromeOS gets the exact same Zoom experience as a full desktop environment.
Choosing Your Path The Zoom PWA vs The Web Client
The biggest decision comes first. On a Chromebook, Zoom isn’t really one thing. It’s two main ways of accessing the same service, and they don’t feel identical in daily use.
The Zoom PWA is often the better option. It behaves more like an installed application, opens in its own window, and generally feels cleaner than running everything inside a standard browser tab. The Web Client still has a place, especially on shared devices or for fast one-time joins, but it’s the backup path, not the primary one.

What the PWA gets right
The PWA fits how Chromebooks are meant to work. It launches separately, gives you a more app-like interface, and reduces some of the clutter that comes with keeping Zoom trapped inside a busy browser session. If you’re joining meetings every day, that cleaner separation matters.
It also carries the features most users ask about first. Zoom says the Chromebook PWA supports 25-person Gallery view, virtual backgrounds, and background blur, but it also notes current limitations, including no Annotate option on shared screens, while Share Audio with screen shares was only expected to launch in summer 2025 in its product update on using Zoom on a Chromebook.
That’s the trade-off in one sentence. The PWA is the best Zoom experience on ChromeOS, but it still isn’t feature parity with a traditional desktop client.
When the Web Client makes sense
The Web Client is useful when you need fast access and don’t want to install anything. That could be a borrowed Chromebook, a temporary login, a kiosk-style environment, or a support situation where you just need someone in the meeting now.
Still, the Web Client tends to feel more fragile in real work. It shares browser resources with every other open tab. It’s easier for users to lose the meeting tab, mute the wrong thing, or get distracted by notifications and tab clutter. If someone already has email, docs, chat, and multiple dashboards open, the browser tab model can become the weak point.
A practical comparison
| Option | Best for | Strengths | Weak spots |
|---|---|---|---|
| Zoom PWA | Daily users, managed devices, school and work accounts | More integrated feel, stronger feature set, separate window | Still missing some desktop-level features |
| Web Client | One-off joins, shared devices, quick access | No install required, simple entry point | More browser load, less polished daily experience |
There’s also a broader strategic question here. If your team is comparing whether a browser tab or app model creates fewer support issues, this breakdown of browser-based vs app-based video conferencing platforms is useful because it frames the decision around workflow rather than brand loyalty.
Practical rule: If you use Zoom on a Chromebook more than occasionally, install the PWA. If you join once in a while and don’t care about polish, the Web Client is fine.
That recommendation comes from support reality, not marketing. The PWA is the path with fewer surprises. The Web Client is the path you keep in reserve.
Installing and Configuring Zoom The Right Way
The most common Chromebook Zoom mistake happens before the first meeting. Someone installs the right version, but leaves an older Zoom app, extension, or shortcut sitting on the device. Then menus don’t match screenshots, links open in the wrong place, and users assume Zoom is broken when it’s conflicting with itself.
Start by cleaning house.

Remove the old Zoom clutter first
Check the Chromebook launcher, Chrome extensions, and Play Store-installed apps. If you see old Zoom entries that aren’t the current Chromebook PWA, remove them before doing anything else. This step fixes a surprising number of “Zoom looks different on my screen” complaints.
After that, go to the Google Play Store and install Zoom Workplace for Chromebook, which is the PWA version Zoom now points Chromebook users toward.
A few hardware and software details matter here. A setup guide tied to Chromebook Zoom deployment notes that users should first uninstall legacy Zoom apps to avoid conflicts, that the recommended PWA requires ChromeOS 94+, and that devices should have at least 4GB of RAM, with Zoom using about 1-1.5GB of active memory during sessions. The same guide also recommends enabling hardware acceleration in Chrome flags for a 30-50% latency reduction in supported scenarios, as covered in this Chromebook Zoom setup walkthrough.
The clean install checklist
Use this sequence and you’ll avoid most first-day issues:
- Delete old Zoom entries: Remove outdated apps and Chrome extensions first.
- Update ChromeOS: If the device is behind on updates, fix that before installing Zoom.
- Install the PWA from the Play Store: Don’t grab random browser add-ons that look similar.
- Pin it to the shelf: That gives users one clear launch point.
- Sign in once before meeting time: Let the account sync and settle before a live call.
Permissions are where meetings succeed or fail
Once the PWA is installed, open it and immediately test camera and microphone access. Don’t wait for a client call to discover ChromeOS denied one of them.
Look for three things:
- Microphone access: Make sure ChromeOS didn’t block Zoom after a previous denial.
- Camera selection: Some users have multiple cameras connected, and Zoom won’t always pick the intended one.
- Speaker output: Chromebook audio may still be routed to HDMI, Bluetooth, or a dock you forgot was connected.
If a user says, “Zoom can’t see my mic,” I assume permissions first, hardware second, and Zoom third. That order saves time.
Settings worth adjusting before your first real meeting
Inside Zoom settings, test your selected devices and keep the configuration simple. Use the built-in webcam unless you have a clear reason to add external hardware. If the Chromebook is modestly specced, skip cosmetic effects at first and prioritize stability.
I also recommend launching one test meeting alone. Join, mute, unmute, stop and start video, and share a tab. That private rehearsal catches the small stuff that official setup guides tend to gloss over.
A good Chromebook Zoom setup isn’t complicated. It’s disciplined. Remove the old pieces, install the correct one, verify permissions, and make sure the device isn’t trying to do five unnecessary things at once.
Mastering Your Meetings Join Host and Share Like a Pro
Most Chromebook users don’t struggle with Zoom because the buttons are hidden. They struggle because meeting tasks pile up fast. Join link. Waiting room. Audio prompt. Camera check. Chat alert. Screen share request. By the time they find the right control, the moment has passed.
That’s why it helps to think in common scenarios instead of feature menus.

Joining without fumbling
You click a meeting link from email on a Chromebook. In a clean setup, it should hand off to the Zoom PWA or open the browser-based join flow cleanly. If the Chromebook asks how to open the link, slow down and read it. Users often click the wrong option once, then spend the next month opening Zoom the wrong way.
If you’re joining by Meeting ID, enter it manually from the PWA and confirm the display name before entering. In managed environments, I’ve seen users join under the Chromebook device name or a child account alias, which creates confusion for hosts trying to admit them from the waiting room.
A good pre-join habit is simple:
- Mute first: Join muted if the room around you is active.
- Check framing: Chromebook webcams are often less forgiving than external cameras.
- Confirm background: What looks neutral to you may look cluttered on camera.
- Watch the waiting room: Don’t assume the host can see you immediately.
Hosting on Chromebook takes a lighter touch
If you host meetings from a Chromebook, keep your workflow lean. Schedule through your usual calendar flow, then open the meeting from the PWA rather than juggling multiple tabs at launch. Host controls are there, but they feel easier to manage when the meeting itself is the main active window.
Use built-in Zoom security tools early, not after a problem starts. The Chromebook Zoom experience still gives you access to controls like meeting locks, Waiting Room management, and participant removal through the security controls in the meeting interface. That’s enough for most internal meetings if you stay attentive.
Hosts on Chromebooks do best when they simplify. One screen, one main app window, one browser tab for reference material, and nothing extra unless it’s necessary.
Screen sharing on ChromeOS
Screen sharing is where users most often assume Chromebook Zoom behaves exactly like desktop Zoom. It doesn’t always. You can share your full screen or a browser tab, and for many presentations that’s enough. But if your workflow depends on highly polished annotation or advanced media-sharing options, the Chromebook compromise becomes apparent.
If screen sharing fails, the issue is usually one of three things:
- ChromeOS didn’t grant the expected permission.
- The wrong window or tab was selected.
- The device is under load and the handoff stutters.
This troubleshooting guide for screen sharing not working is worth bookmarking because the same root causes show up across meeting platforms.
The Chromebook-friendly meeting style
The users who look most professional on a Chromebook aren’t usually doing more. They’re doing less, more deliberately.
They keep one browser tab ready for links, one document open if needed, and the Zoom window front and center. They use chat, breakout rooms, and reactions when needed, but they don’t try to turn a basic Chromebook into a live production studio. That’s the difference between a smooth meeting and a support call.
Troubleshooting Common Chromebook Zoom Issues
When Zoom on a Chromebook goes wrong, the symptoms usually look random. No mic. Frozen video. Delayed audio. Choppy screen share. In practice, the causes are predictable. Most failures come from permissions, limited hardware, unstable Wi-Fi, or too many things running at once.
Treat troubleshooting like triage. Fix the likely problems first, not the exotic ones.

Audio issues that keep repeating
A user says nobody can hear them. First check whether Zoom has microphone permission. Then check whether ChromeOS switched the input to the wrong device. Bluetooth earbuds, docking gear, and USB microphones all create confusion if they were connected earlier and then disconnected.
Echo is another Chromebook classic. Built-in mics and speakers are convenient, but they’re not ideal in reflective rooms or shared spaces.
Zoom support guidance for Chromebook-style deployments notes that a quad-core 2.5GHz+ CPU is best for smooth screen sharing, that turning off virtual backgrounds on devices with less than 8GB of RAM can prevent 15-25% CPU spikes, and that using a USB or Bluetooth headset can improve audio satisfaction by over 35% by reducing echo, according to this Zoom support benchmark overview.
If audio complaints keep coming up in one office, don’t just blame Zoom. Fix the room and network conditions too. This guide on how to improve office Wi-Fi is useful because lag often gets reported as an app problem when the wireless environment is the underlying cause.
Video and camera failures
A black camera tile doesn’t always mean the webcam is dead. On Chromebooks, I check these in order:
- Physical obstruction: Privacy slider, case edge, tape, or dirt on the lens.
- Permission state: ChromeOS or browser permission was denied.
- App hang: Zoom is still open but the camera handoff failed.
- Another process using the camera: Browser tab or another app grabbed it first.
Restarting only the meeting tab isn’t always enough. Fully close Zoom, clear the active session, and reopen it cleanly. If the problem appears after waking from sleep, a full reboot is often faster than chasing the glitch.
Performance problems that feel like “Zoom is slow”
Chromebook expectations need a reset. A lightweight Chromebook can handle ordinary meetings. It struggles when users add screen sharing, virtual backgrounds, lots of tabs, cloud docs, and messaging apps all at once.
Use this quick table as a field guide:
| Symptom | Most likely cause | Best next step |
|---|---|---|
| Choppy video | Too many tabs or weak Wi-Fi | Close tabs, move closer to access point |
| Poor screen share | Low-end CPU or overloaded system | Stop background apps, reduce meeting tasks |
| Fan noise and lag | Effects and multitasking | Disable visual extras, keep one main window |
| Echo or hollow sound | Built-in audio loop | Switch to USB or Bluetooth headset |
Browser meetings punish clutter. If a Chromebook is acting slow in Zoom, I look at the number of open tabs before I look at the app itself.
For recurring failures, run through a broader checklist of video call problems so you can separate device issues from platform issues. That matters because some Chromebook complaints are solvable, while others are the limits of the hardware and app model.
Beyond Zoom Browser-Native Conferencing for Professionals
After enough Chromebook rollouts, a pattern becomes obvious. You can make Zoom work well on ChromeOS, but you’re still managing compromises. The PWA is the best path available, yet it remains a translation layer of sorts. It’s Zoom adapted for the Chromebook world, not a meeting experience designed from the ground up around the browser.
That distinction matters more in professional settings. In schools and casual internal meetings, a workable solution is often enough. In healthcare, legal, executive, or client-facing environments, “good enough on this device” starts to wear thin. Users want fewer moving parts, fewer update questions, fewer permission detours, and less hardware sensitivity.
Why browser-native matters on a Chromebook
A Chromebook is at its best when the browser is the product, not just the container. That aligns especially well with accessibility and simplicity. Google’s Chromebook accessibility guidance shows the platform already supports built-in tools like full-screen magnification with keyboard shortcuts, page zoom controls, and touchpad pinch-to-zoom, and in educational settings students reached 90% accuracy on magnification tasks within three trials using those controls, according to Google’s Chromebook zoom and magnification support documentation.
That matters because browser-native conferencing can lean into those system strengths instead of asking the user to cope with them. The fewer layers between the browser, the operating system, and the meeting itself, the fewer things users have to interpret under pressure.
Where Zoom starts to feel compromised
On a Chromebook, Zoom usually asks the user to accept some combination of these realities:
- Feature inconsistency: Some capabilities arrive later, look different, or remain limited.
- Resource sensitivity: Performance shifts noticeably based on tabs, RAM, and effects.
- Support overhead: Users need more guidance than they do on a full desktop client.
- Workflow friction: Hosting and presenting can feel like careful balancing rather than smooth execution.
That doesn’t make Zoom unusable. It makes it situational.
If your work regularly involves presentations across browser-first platforms, it also helps to study adjacent workflows. This tutorial on how to master Google Meet presentations is a good reminder that browser conferencing works best when the product and the platform are aligned.
The practical conclusion
For Chromebook users, the question isn’t whether Zoom can run. It can. The better question is whether your team wants to keep managing a functional workaround or move to a conferencing tool that’s native to the browser from the first click.
That’s the line between “supported” and “well suited.” On Chromebooks, that line shows up quickly.
If your team wants video meetings, webinars, screen sharing, recordings, and AI transcripts without app installs or Chromebook-specific workarounds, take a look at AONMeetings. It’s built for the browser from the start, which makes it a cleaner fit for ChromeOS users who need a professional, dependable conferencing setup.